How to Calibrate the PID Controller of Topstar Injection Moulding Dryer for 1℃ Temperature Accuracy?
2026/03/02 By le zhan
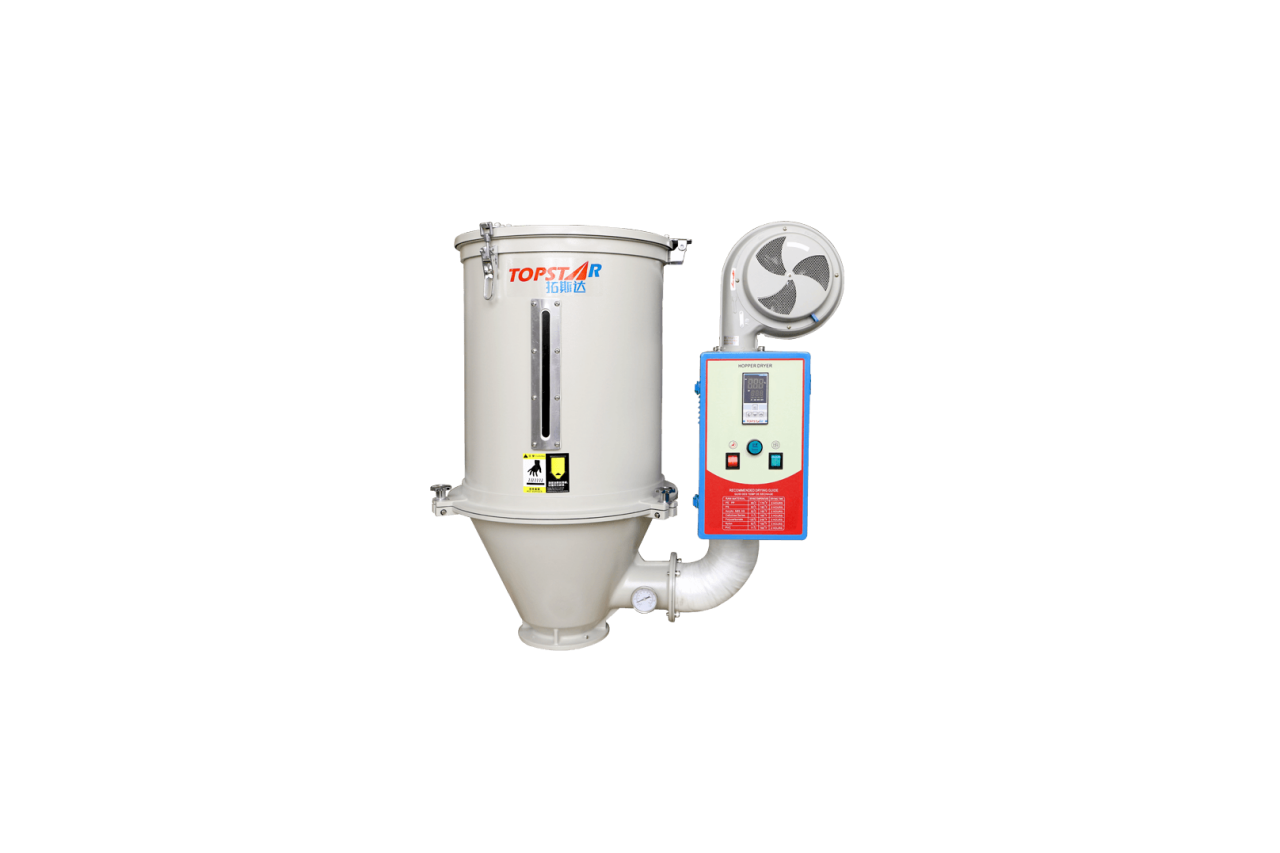
Precise temperature control in the injection moulding dryer ensures stable part quality and reduces scrap rates. For materials such as PA, PET, and PBT, the ±1℃ temperature control range in injection moulding dryers often determines whether dimensional tolerances or product mechanical properties meet standards. For users new to our dryers, we will explain here how to calibrate the PID controller on Topstar injection moulding dryers to achieve ±1℃ accuracy, resulting in more precise temperature control.
Calibration Process of PID Control in Injection Moulding Dryers
Before adjusting any PID parameters, the mechanical and electrical performance of the injection moulding dryer must be stable. Many control problems do not stem from improper parameter tuning, but from overlooked hardware inconsistencies. Therefore, pre-calibration checks are essential.
First, check the heater assembly. Topstar hopper dryers use high-efficiency heating modules designed for uniform heat distribution. Confirm that the heater resistance is within specifications and that the solid-state relays (SSRs) are functioning correctly, without delay or abnormal heating. Unstable SSR switching cycles directly affect PID output characteristics. Next, check the airflow system. The blower motor must operate at its rated speed, and the air circulation channels within the hopper dryer must remain clear. Clogged filters or uneven airflow will create temperature gradients, which no PID algorithm can fully compensate for.
Furthermore, ensure the input voltage is stable to within ±5%; ensure proper grounding to reduce signal noise; and ensure clean air filters and intact hopper insulation, with no material bridging or dead zones within the hopper. PID calibration should begin only when the injection moulding dryer is in mechanically stable operation. This rigorous approach ensures that parameter adjustments are aimed at optimising control rather than compensating for physical defects.
Characteristics of the PID Controller for the Injection Moulding Dryer
PID control in the injection moulding dryer adjusts the heater output based on three components:
- Proportional (P): Reacts to current temperature deviations
- Integral (I): Eliminates long-term steady-state errors.
- Derivative (D): Predicts future trends and reduces overshoot.
In the hopper dryer, temperature control exhibits thermal inertia. Due to factors such as heater mass, airflow, and material heat absorption, the system response is relatively slow. Therefore, PID parameter tuning must account for delay and heat-storage effects. Injection moulding dryers equipped with PID control systems integrate intelligent automatic tuning algorithms, adjustable sampling intervals, and temperature deviation alarms. However, automatic tuning only provides a baseline. To achieve an accuracy of ±1℃, manual fine-tuning is essential. Precise control and adjustment of P, I, and D ensure rapid response without oscillation under load changes and maintain long-term stable regulation performance.

Detailed Explanation of PID Calibration Steps
A structured approach ensures consistent results. The calibration steps are as follows:
Step 1: Establish Baseline Conditions
Set the injection moulding dryer to the target drying temperature with the hopper empty. Record the temperature profile for at least 30 minutes to observe the natural temperature rise time and overshoot characteristics.
Step 2: Run Automatic Tuning Under Load
Add production material to simulate actual operating conditions. Activate the automatic tuning function to generate initial PID parameter values based on actual thermal mass and airflow resistance.
Step 3: Evaluate Overshoot and Settlement Time
If the overshoot exceeds 2°C, slightly decrease “P” or increase “D”. The goal is smooth convergence within ±1°C with minimal delay.
Step 4: Adjust the Integral Term to Eliminate Offset
If the steady-state temperature stabilises 0.5–1°C below the target temperature, gradually increase “I”. Avoid abruptly increasing the integral gain to prevent oscillations.
Step 5: Optimise the Sampling Interval
Hopper dryers are typically suited to a sampling interval of 0.5–1 seconds. Too long an interval reduces response speed; too short an interval increases sensitivity to noise.
Step 6: Disturbance Testing
Simulate cold-material loading and monitor the temperature recovery time. A well-calibrated injection moulding dryer should recover temperature stability within ±1°C in a predictable timeframe, without fluctuations.
Validation, Optimisation, and Long-Term Stability of Injection Moulding Dryer
Statistical performance testing is required to confirm 1°C accuracy. Run the hopper dryer under stable production conditions for at least two hours. Furthermore, temperature data must be recorded regularly to assess average temperature deviation, maximum fluctuation range, standard deviation, and overshoot following disturbances. Ideally, the steady-state deviation of the injection moulding dryer should be kept within ±0.5℃, and the maximum fluctuation within ±1℃. We also recommend multi-point verification. Measure the temperature at different depths within the hopper to confirm uniform air distribution. An uneven temperature distribution may indicate an airflow imbalance rather than a PID error.
Long-Term Maintenance and Drift Prevention
Achieving an accuracy of 1℃ once is insufficient; maintaining this accuracy over the long term is crucial. Without proactive management, environmental dust, heater ageing, and sensor drift will gradually affect performance. Routine maintenance should include recalibrating RTD every 6-12 months, regularly cleaning filters, checking SSR heat dissipation efficiency, and checking fan motor stability. Monitoring controller log data helps detect drift patterns before they affect product quality.
In addition, the displayed temperature should be regularly compared with an externally calibrated thermometer to ensure consistency. The Topstar injection moulding dryer control platform supports customizable alarm thresholds and the storage of historical performance data, enabling predictive maintenance rather than reactive repairs. Therefore, continuous preventative measures significantly extend equipment life and maintain temperature accuracy over years of operation.

PID Instability Troubleshooting Guide
Even with proper calibration, operational variations can occasionally lead to system instability. A structured troubleshooting process can avoid unnecessary downtime.
If the temperature fluctuates around the setpoint, slightly reduce the proportional gain or increase the differential damping. If the temperature rises too slowly, check the heater efficiency and consider increasing the proportional gain slightly. A consistently stable deviation indicates the need for integral adjustment. Random fluctuations usually indicate electrical noise or poor grounding. A significant temperature drop during material feeding requires optimising the feed rate or fine-tuning the PID to restore balance. Avoid drastic parameter changes; small incremental adjustments yield stable results.
Achieving Precise Temperature Control Accuracy
Achieving ±1°C accuracy in Topstar injection moulding dryers requires a combination of suitable sensors, rigorous pre-inspection procedures, intelligent PID control, meticulous verification, and routine calibration and maintenance. By following the adjustment steps above, your process and quality teams will benefit from fewer scraps, more consistent production cycles, and measurable cost savings.
TRENDING POSTS
- TOPSTAR Global Open Day 2025: Humanoid Robot Debuts, Pioneering a New Decade of Intelligent Manufacturing 2026/03/02
- Topstar Showcases TE II Electric Injection Molding Machines at InterPlas Thailand 2025 2026/03/02
- Topstar Expands Its Ecosystem Partnerships to Drive Smart Manufacturing Innovation 2026/03/02
- What factors can cause delays in the injection molding process of plastic molding machine? 2026/03/02
HOT TOPIC
- .ervo motor-driven linear robots
- •
- 1.0 guangdong topstar technology co. ltd
- 1.0 topstar china
- 1.0 topstar robot
- 11
- 160℃ mold temperature controller
- 170 ton injection molding machine
- 2
- 21
- 220-ton injection molding machine
- 23
- 260 ton injection molding machine
- 3 axis robot
- 3 axis robots
- 3 in 1 Compact Dehumidifying Dryer
- 3-axis robot
- 3-axis robots
- 39
- 41
- 460T injection molding machine
- 5-axis CNC machine
- 62
- 90 ton injection molding machine
- accuracy
- Air Chillers
- all electric injection molding machine
- all electric injection molding machines
- all-electric injection molding machine
- All-electric injection molding machines
- and overall production quality. Therefore
- AP-RubberPlas
- auto loader
- automated injection molding machine
- Automation changed engineering
- automation of injection molding robots
- automotive parts injection molding
- Auxiliary Equipment
- auxiliary machine
- Bench Injection Molding Machine
- cabinet dryer
- Cabinet dryer manufacturers
- Cabinet dryers
- chiller
- CNC Drilling Machine
- CNC Drilling Machines
- cnc engraving machine manufacturer
- cnc laser cutting machine manufacturer
- CNC machine
- CNC Machine Center
- CNC Machine for Sale
- CNC Machine Manufacturing
- CNC Machine Tool
- CNC machine tool product
- CNC Machining Center
- CNC wood carving machine
- Cooling system
- Cross-Walking Single Axis Servo Cylinder Robot
- Cross-Walking Single-Axis Servo Cylinder Robot
- Cross-Walking Three-Axis/Five-Axis Servo Driven Robot
- cross-walking three-axis/five-axis servo-driven robot
- Dehumidifier Dryer
- Dehumidifying Dryer
- delta parallel robot
- Desktop Injection Molding Machine
- Desktop injection molding machines
- Desktop Molding Machine
- desktop plastic injection machine
- Desktop Plastic Injection Molding Machine
- Digital Transformation
- direct clamp injection molding machine
- Direct clamp injection molding machines
- Dosing & mixing system
- Drilling Centers
- Drying and dehumidification system
- drying and dehumidifying equipment
- Drying and Dehumidifying System
- drying system
- effective and efficient. Cabinet dryers are also used in other industries where large quantities of material need to be dried
- efficient injection molding machine
- elbow hydraulic injection molding machines
- electric injection molding machine
- electric injection molding machines
- energy-efficient injection molding robot
- energy-efficient water chiller
- energy-efficient water chillers
- energy-saving injection molding machine
- etc. Among injection molding robots
- exhibition
- features of CNC machine
- Feeding And Conveying System
- Five Axis Machine Center
- Flexible Production Line
- Fully automatic injection molding machine
- Gathering Topstar
- giant injection molding machine
- GMU-600 5-Axis Machining Center
- Granulating & Recycling System
- granulator machine
- gravimetric blender
- Heavy duty injection molding machine
- High-precision electric molding machines
- high-precision plastic molding machines
- high-speed all electric injection molding machine
- high-speed electric injection molding machine
- High-Speed Packaging Injection Molding
- Honeycomb rotor dehumidifier
- Hopper Dryers
- horizontal injection molding machine
- Horizontal Injection Molding Machines
- Horizontal Injection Moulding Machine
- Horizontal Mixer manufacturer
- How The CNC Machine Works
- hybrid injection molding machine
- hydraulic injection molding machine
- Hydraulic Injection Molding Machines
- in this article
- Industrial AI
- Industrial Automation
- Industrial robot
- Industrial Robot Chinese brand
- industrial robot parts
- industrial robot supplier
- Industrial robots
- Industry Chain
- Injection Manipulator
- injection manipulator robot
- injection mold machines
- Injection molding
- Injection molding automation
- Injection Molding Automation Solution
- injection molding dryer
- Injection molding equipment
- injection molding hopper dryer
- Injection molding machine
- injection molding machine brand
- Injection Molding Machine Factory
- Injection Molding Machine Manufacture
- Injection molding machine manufacturer
- injection molding machine manufacturers
- Injection molding machine procurement
- injection molding machine robotic arm
- injection molding machine with a robot
- Injection molding machines
- injection molding material dehumidifying
- injection molding plant
- injection molding process
- Injection Molding Robot
- injection molding robot arm
- Injection molding robot automation
- Injection molding robotic arm
- injection molding robots
- injection moulding dryer
- Injection moulding machine
- injection moulding machines
- Injection Moulding Robots
- Injection Robot
- Injection robot arm
- Injection robot manufacturer
- Injection robot wholesale
- injection robots
- Intelligent Factory
- intelligent injection molding machines
- Intelligent Manufacturing
- intelligent mold temperature
- intelligent mold temperature controller
- Intelligent mould temperature controller
- InterPlas Thailand 2025
- Introducing Injection Robot
- It is the best choice for drying large quantities of material at once. Cabinetmakers use these machines because they are fast
- Large flow water type mold temperature controller
- large injection molding machine
- large injection molding machines
- Learn what industrial automation and robotics is
- linear robot
- linear robots
- low speed sound-proof granulator
- machine plastic molding
- make sure to add some! Improvements (2) Keyphrase in introduction: Your keyphrase or its synonyms appear in the first paragraph of the copy
- manipulator machine
- manufacturing
- Manufacturing Innovation
- medical grade injection molding machines
- Medical Injection Molding
- medical injection molding machine
- medical injection molding machines
- micro injection molding machine
- middle speed granulator
- Mini CNC machine manufacturers.
- mobile cover making machine
- Mold Temperature Control System
- mold temperature controller
- mold temperature controllers
- molding machine
- molding material Dehumidifying System
- mould temperature control system
- mould temperature controller
- mould temperature controllers
- New electric injection molding machine
- nitrogen dryer manufacturer
- nitrogen dryer system manufacturer
- Oil type mold temperature controller
- Oil type mold temperature controllers
- open day
- optical component injection molding
- Outbound links: No outbound links appear in this page. Add some! Images: No images appear on this page. Add some! Internal links: No internal links appear in this page
- packaging injection molding
- Packaging Solutions
- PET Preform injection molding
- phone case maker machine
- phone case making machine
- phone cover making machine
- PID Control Mold Temperature Controller
- plastic auto loader
- plastic bottle making machine
- plastic bottle manufacturing
- plastic bucket making machine
- plastic bucket manufacturing
- Plastic chair making machine
- plastic dryer for injection molding
- plastic forming equipment
- Plastic Granulators
- plastic hopper dryer
- plastic injection machine
- plastic injection machines
- plastic injection molding
- Plastic injection molding equipment
- Plastic injection molding machine
- Plastic Injection Molding Machines
- plastic injection moulding machine
- plastic injection moulding machines
- plastic injection robot
- plastic molding
- Plastic Molding Industry
- Plastic Molding machine
- plastic molding machine 1
- Plastic Molding Machines
- plastic molding press
- plastic moulding machine
- plastic phone case making machine
- plastic-molding machine
- powerful granulator
- Powerful Type Sound-Proof Granulator
- precision injection molding
- precision injection molding machines
- production of plastic seats
- pure water mould temperature controller
- Robot injection molding
- robot injection molding machine
- robot manufacturing companies
- Robotic arm for injection molding machine
- robotic injection molding machines
- robotics in injection molding
- SCARA robot
- SCARA robots
- Screw dosers
- Service-oriented manufacturing
- Servo Cylinder Robot
- servo driven robot
- Servo Driven Robots
- servo injection molding machine
- servo injection robots
- servo motor-driven linear robots
- servo-driven 3-axis robot
- Servo-driven injection molding machine
- Servo-Driven Robot
- Setup of injection machine
- Silicone Injection Molding Machine
- six-axis industrial robot
- Smart Manufacturing
- soundproof granulator
- Stainless Hopper Dryer
- Stainless Hopper Dryers
- star club
- swing arm robot
- take-out robot
- take-out robots
- Thailand 4.0
- the choice between servo-driven robots and hydraulic robots will have a certain impact on efficiency
- the most popular injection molding machine
- the type of injection molding robot
- TIC2000 Control System
- TMII injection molding machine
- toggle clamp injection molding machine
- Toggle Hydraulic Injection Molding Machines
- toggle injection molding machine
- Top 10 brands of injection robots
- Topstar
- Topstar Electric Injection Molding Machine InterPlas Thailand 2025 Smart Manufacturing Thailand 4.0
- Topstar Engineering
- Topstar Industrial Robots
- Topstar injection molding intelligent
- Topstar Scara Robots
- Useful Injection molding machine
- Vertical machining centers
- volumetric type blender
- water chiller
- water chillers
- water distributor
- water type mold temperature controller
- Water Type MoldTemperature Controller
- Water-Type Mould Temperature Controllers
- We often face choices when performing injection molding. We will choose the type of injection molding machine
- wholesale of injection molding machines
- x carve CNC
- 热门查询 点击次数 展示 排名 topstar