
Why Is My Cartesian Coordinate Robot Arm Not Moving or Moving Slowly?
2026/09/20 By le zhan
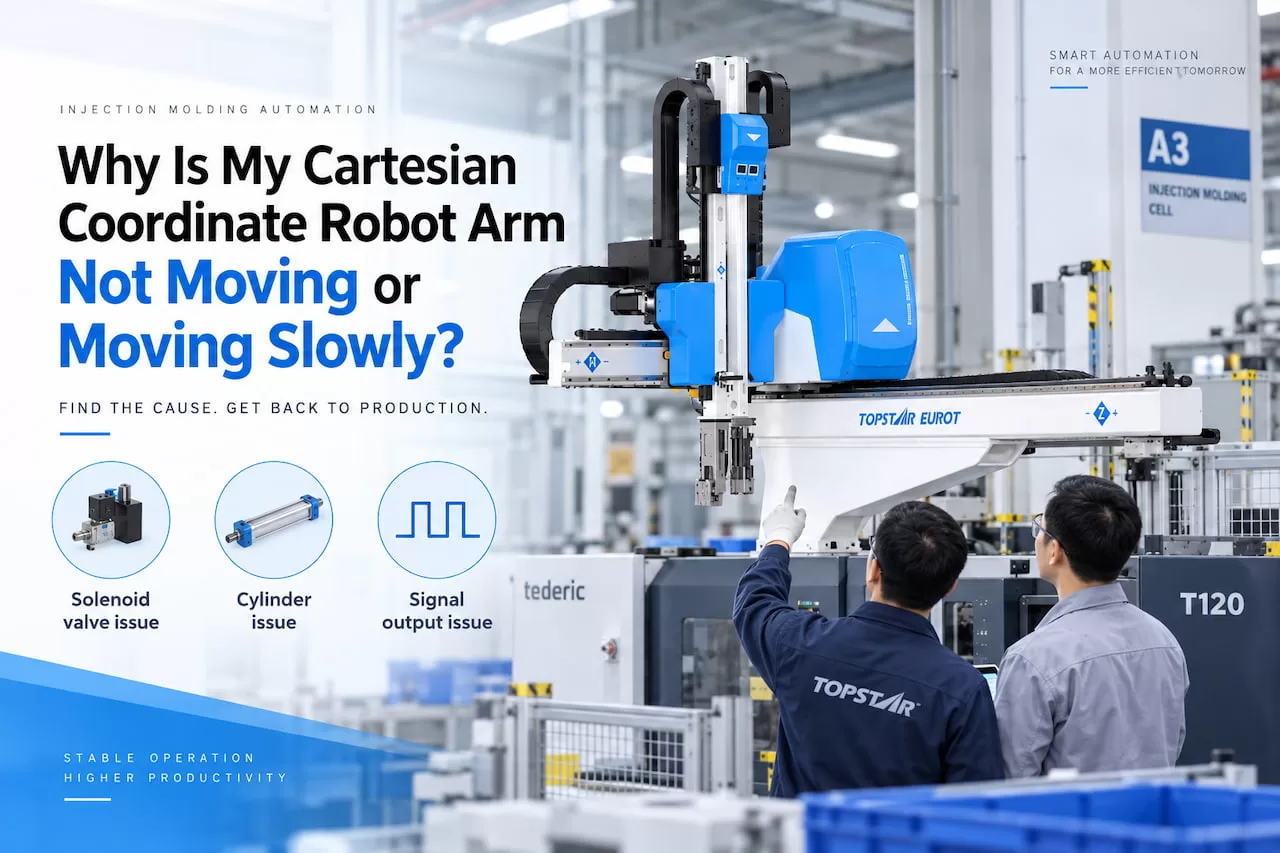
During production, if your Cartesian Coordinate robot arm suddenly stops moving or its operating speed slows significantly, the problem is often in the pneumatic circuit controlling the auxiliary arm, gripper, wrist, or related mechanisms.
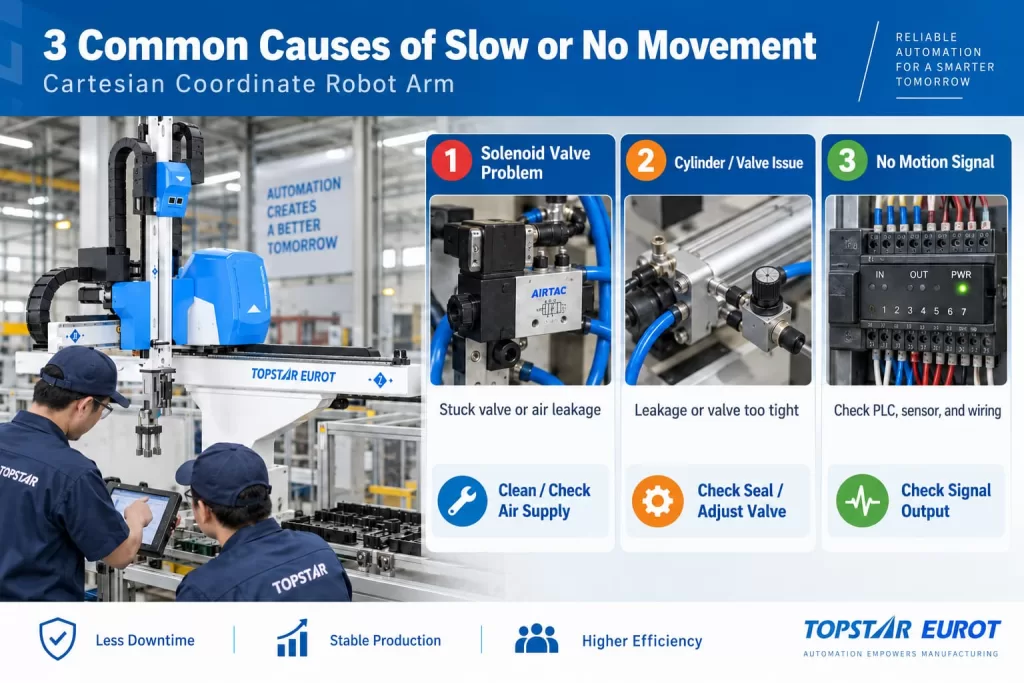
For pneumatic operations, you should prioritise troubleshooting the following three causes:
- Solenoid valve sticking or air leakage
- Cylinder leakage or a control valve set too tight
- No motion signal output
The following troubleshooting steps apply to abnormal movements related to the pneumatic circuit. If the servo spindle itself has stopped running, check the servo drive, encoder, limit switches, alarm status, and controller separately.
Three Common Causes of Non-Operation or Slow Movement in Cartesian Coordinate Robot Arms
A practical troubleshooting principle is to follow the command path from the controller to the actuator:
Motion command → Solenoid valve → Compressed air circuit → Cylinder → Mechanical movement
If any link in this chain fails, the Cartesian Coordinate robot arm may stop completely or operate more slowly than expected.
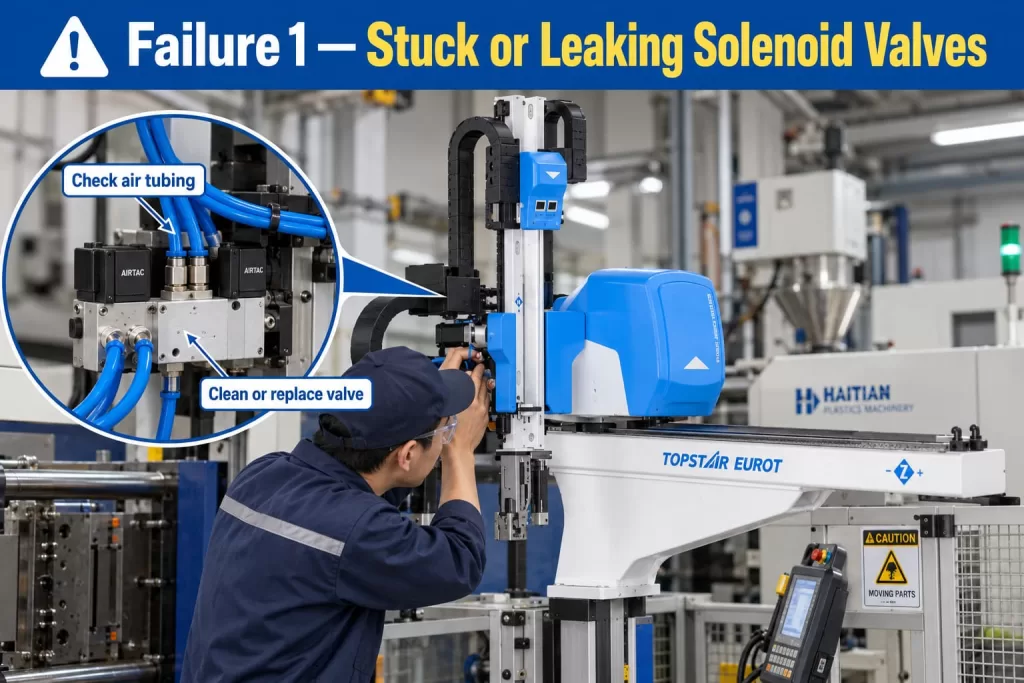
Cause of Cartesian Coordinate Robot Arm Failure 1 — Stuck or Leaking Solenoid Valves
Solenoid valves control the flow of compressed air into and out of pneumatic actuators. If the valve spool is stuck, fails to switch directions properly, or develops an internal leak, the cylinder may not receive sufficient airflow or pressure.
Typical symptoms include delayed motion, weak motion, intermittent operation, or no response at all despite a command being issued. Air leaks in the air lines or fittings can cause similar issues, as pressure is lost before it reaches the actuators.
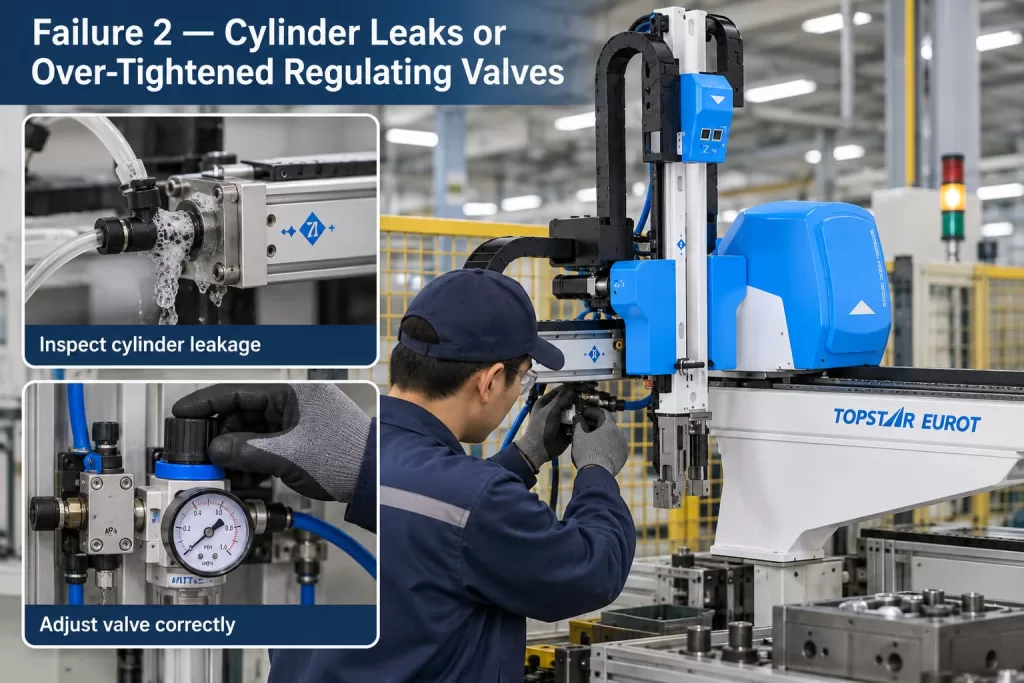
Cause of Cartesian Coordinate Robot Arm Failure 2 — Cylinder Leaks or Over-Tightened Regulating Valves
If the valves are functioning properly but the Cartesian robotic arm’s movement remains slow, inspect the pneumatic cylinder and its flow control valve.
Internal leaks in the cylinder allow compressed air to bypass the piston seals, preventing effective thrust. Speed control valves or regulating valves can also cause this. If a regulating valve is set too tightly, it restricts airflow and prevents the cylinder from operating at the intended speed.
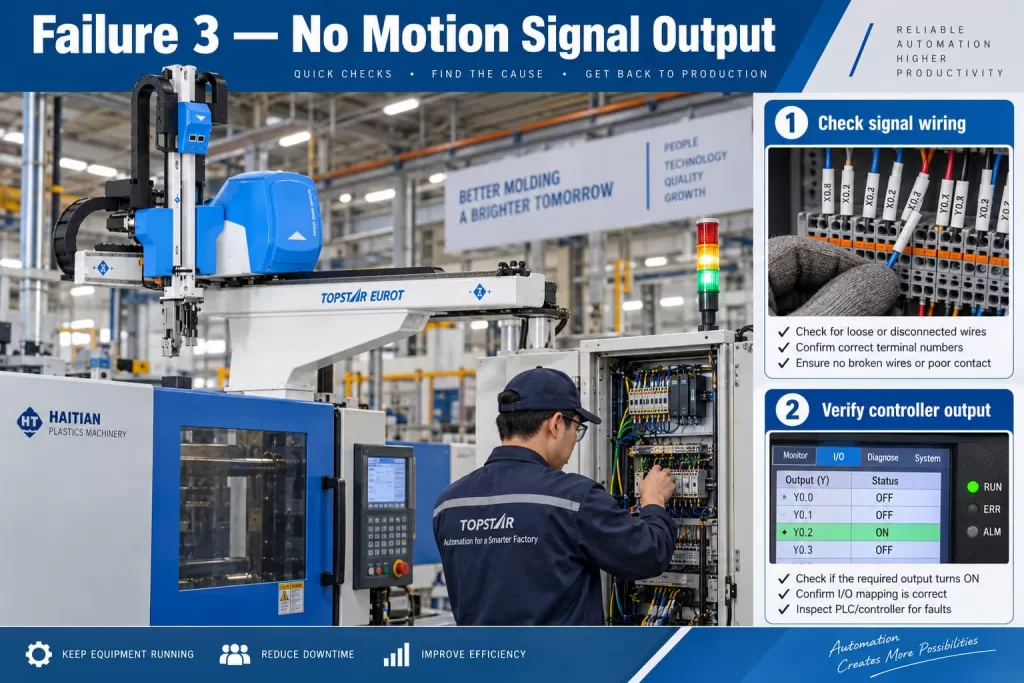
Cause of Failure 3 — No Motion Signal Output
If the pneumatic components appear normal, the next issue to address is whether the controller is actually issuing commands. If the solenoid valve does not receive an output signal, the Cartesian injection molding robot arm cannot perform the required motion.
Possible causes include:
- Loose or damaged signal wiring;
- Poor connector contact;
- Open circuit in the output line;
- Incorrect program condition settings;
- Interlock conditions preventing motion execution
For example, the program may require confirmation that the mold is open before allowing the robotic arm to move. If this condition is not met, the controller may intentionally withhold the motion command. Therefore, you need to distinguish between the two scenarios: “the solenoid valve received the command but did not respond” and “the controller did not send the command at all.”
Three Recommended Solutions for Faults in Cartesian Robotic Arms
Once you’ve narrowed the fault to the pneumatic actuation circuit, follow the same sequence for corrective action.
Solution 1 — Clean or Replace the Solenoid Valve and Inspect the Air Lines
First, confirm that compressed air is reaching the solenoid valve and that the pressure meets specifications. Then check the following:
- Valve switching operation;
- Exhaust conditions;
- Whether the air hoses are kinked;
- Whether the fittings are loose;
- Whether there are any audible air leaks;
- Whether the valve contains contamination.
If contaminants are causing the spool to stick, clean the valve according to the applicable maintenance procedures; if unreliable switching is due to wear or internal damage, replace the valve. Never compensate for leaks by increasing supply pressure; repair the leak first.
Solution 2 — Repair the Cylinder or Readjust the Flow Control Valve
Next, check the cylinder’s pressure-holding performance to confirm whether there are severe internal or external leaks.
Damaged piston seals or a damaged cylinder can reduce effective output force, causing slow or erratic movement. Once you confirm a leak, repair or replace the damaged cylinder components. Also inspect the flow control valve. If the valve is too closed, gradually open it while observing the robot arm’s operating speed. Avoid fully opening the valve without considering the mechanical motion characteristics. Doing so can cause excessive speed, leading to impact at the end of the stroke and accelerated wear.
Solution 3 — Inspect and Repair the Motion Signal Circuit
If the pneumatic hardware operates normally during manual testing, inspect the electrical command circuit. Verify that the controller’s output signal changes accordingly when the program issues a motion command; then check the wiring between the controller and the solenoid valve. You should focus on inspecting the following areas:
- Output terminals;
- Connectors;
- Broken wires;
- Condition of the solenoid coils;
- Necessary interlock signals.
Our Cartesian Coordinate robot architecture integrates mold signals, EOAT, I/O signals, and downstream automation equipment into a coordinated motion sequence. So, even if the mechanical components are in good condition, missing machine or interlock signals may prevent the commanded motion from executing.
Follow This Diagnostic Sequence Before Replacing Parts
When performing on-site troubleshooting, follow these steps:
Check motion output signals → Check solenoid valves → Check air hoses → Check cylinders → Adjust flow control valves.
If there is no output signal, first check the wiring, program conditions, or interlock signals.
If there is an output signal but the valve does not actuate, inspect or replace the solenoid valve.
If the valve operates normally but the robot arm moves slowly, check for leaks, blocked air hoses, cylinder malfunctions, or flow-control issues. This method helps avoid unnecessary component replacements and ensures the troubleshooting process remains focused. To view more troubleshooting information for Cartesian robots, please visit: Product Malfunction Issues
TRENDING POSTS
- Breaking Through the Full Scene-to-AI Link! Topstar Industrial Data Collection Matrix Achieves Major Technical Breakthro 2026/09/20
- TOPSTAR Selected in “Forbes China AI Top 50” and Wins “2026 Embodied AI Industry Benchmark Award” 2026/09/20
- Topstar Achieves ISO 13849 Functional Safety Certification for Robotics 2026/09/20
- Topstar Completes Key Puzzle in Embodied Intelligence Data Closed Loop — Industrial AI Capability Foundation Now in Place 2026/09/20
HOT TOPIC
- .ervo motor-driven linear robots
- •
- 1.0 guangdong topstar technology co. ltd
- 1.0 topstar china
- 1.0 topstar robot
- 11
- 160℃ mold temperature controller
- 170 ton injection molding machine
- 2
- 21
- 220-ton injection molding machine
- 23
- 260 ton injection molding machine
- 3 axis robot
- 3 axis robots
- 3 in 1 Compact Dehumidifying Dryer
- 3-axis robot
- 3-axis robots
- 39
- 4 axis robot
- 4-axis SCARA robot
- 41
- 460T injection molding machine
- 5-axis CNC machine
- 62
- 90 ton injection molding machine
- accuracy
- Air Chillers
- air-cooled chillers
- all electric injection molding machine
- all electric injection molding machines
- all-electric injection molding machine
- All-electric injection molding machines
- and overall production quality. Therefore
- AP-RubberPlas
- auto cooling system
- auto loader
- Auto Loaders
- automated injection molding machine
- Automation changed engineering
- automation of injection molding robots
- automotive parts injection molding
- Auxiliary Equipment
- auxiliary machine
- Bench Injection Molding Machine
- cabinet dryer
- Cabinet dryer manufacturers
- Cabinet dryers
- cartesian coordinate robot
- Cartesian Coordinate Robots
- Cartesian injection robot
- Cartesian robot
- Central Feeding System
- Central Feeding Systems
- chiller
- CNC Drilling Machine
- CNC Drilling Machines
- cnc engraving machine manufacturer
- cnc laser cutting machine manufacturer
- CNC machine
- CNC Machine Center
- CNC Machine for Sale
- CNC Machine Manufacturing
- CNC Machine Tool
- CNC machine tool product
- CNC Machining Center
- CNC wood carving machine
- Compact Dehumidifying Dryer
- Cooling system
- Cross-Walking Single Axis Servo Cylinder Robot
- Cross-Walking Single-Axis Servo Cylinder Robot
- Cross-Walking Three-Axis/Five-Axis Servo Driven Robot
- cross-walking three-axis/five-axis servo-driven robot
- Dehumidifier Dryer
- Dehumidifying Dryer
- dehumidifying dryers
- delta parallel robot
- Desktop Injection Molding Machine
- Desktop injection molding machines
- Desktop Molding Machine
- desktop plastic injection machine
- Desktop Plastic Injection Molding Machine
- detachable autoloader
- Digital Transformation
- direct clamp injection molding machine
- Direct clamp injection molding machines
- Dosing & mixing system
- Drilling Centers
- Drying and dehumidification system
- drying and dehumidifying equipment
- Drying and Dehumidifying System
- drying system
- effective and efficient. Cabinet dryers are also used in other industries where large quantities of material need to be dried
- efficient injection molding machine
- elbow hydraulic injection molding machines
- electric injection molding machine
- electric injection molding machines
- energy-efficient injection molding robot
- energy-efficient water chiller
- energy-efficient water chillers
- energy-saving injection molding machine
- etc. Among injection molding robots
- exhibition
- features of CNC machine
- Feeding And Conveying System
- Five Axis Machine Center
- Flexible Production Line
- Fully automatic injection molding machine
- Gathering Topstar
- giant injection molding machine
- GMU-600 5-Axis Machining Center
- Granulating & Recycling System
- granulator machine
- gravimetric blender
- Heavy duty injection molding machine
- Heavy-Duty Take-Out Robot
- High-precision electric molding machines
- high-precision plastic molding machines
- high-speed all electric injection molding machine
- high-speed electric injection molding machine
- High-Speed Packaging Injection Molding
- Honeycomb rotor dehumidifier
- hopper dryer
- Hopper Dryers
- horizontal injection molding machine
- Horizontal Injection Molding Machines
- Horizontal Injection Moulding Machine
- Horizontal Mixer manufacturer
- How The CNC Machine Works
- hybrid injection molding machine
- hydraulic injection molding machine
- Hydraulic Injection Molding Machines
- in this article
- Industrial AI
- Industrial Automation
- Industrial robot
- Industrial Robot Chinese brand
- industrial robot parts
- industrial robot supplier
- Industrial robots
- Industry Chain
- Injection Manipulator
- injection manipulator robot
- injection mold machines
- Injection molding
- Injection molding automation
- Injection Molding Automation Solution
- injection molding dryer
- Injection molding equipment
- injection molding hopper dryer
- Injection molding machine
- injection molding machine brand
- Injection Molding Machine Factory
- Injection Molding Machine Manufacture
- Injection molding machine manufacturer
- injection molding machine manufacturers
- Injection molding machine procurement
- injection molding machine robotic arm
- injection molding machine with a robot
- Injection molding machines
- injection molding material dehumidifying
- injection molding plant
- injection molding process
- Injection Molding Robot
- injection molding robot arm
- Injection molding robot automation
- Injection molding robotic arm
- injection molding robots
- injection molding whole plant
- injection moulding dryer
- Injection moulding machine
- injection moulding machines
- Injection Moulding Robots
- Injection Robot
- Injection robot arm
- Injection robot manufacturer
- Injection robot wholesale
- injection robots
- Intelligent Factory
- intelligent injection molding machines
- Intelligent Manufacturing
- intelligent mold temperature
- intelligent mold temperature controller
- Intelligent mould temperature controller
- intelligent whole plant solution
- InterPlas Thailand 2025
- Introducing Injection Robot
- It is the best choice for drying large quantities of material at once. Cabinetmakers use these machines because they are fast
- Large flow water type mold temperature controller
- large injection molding machine
- large injection molding machines
- Learn what industrial automation and robotics is
- linear robot
- linear robots
- low speed sound-proof granulator
- machine plastic molding
- make sure to add some! Improvements (2) Keyphrase in introduction: Your keyphrase or its synonyms appear in the first paragraph of the copy
- manipulator machine
- manufacturing
- Manufacturing Innovation
- medical grade injection molding machines
- Medical Injection Molding
- medical injection molding machine
- medical injection molding machines
- micro injection molding machine
- middle speed granulator
- Mini CNC machine manufacturers.
- mobile cover making machine
- Mold Temperature Control System
- mold temperature controller
- mold temperature controllers
- molding machine
- molding material Dehumidifying System
- mould temperature control system
- mould temperature controller
- mould temperature controller
- mould temperature controllers
- New electric injection molding machine
- Nitrogen Dryer
- nitrogen dryer manufacturer
- nitrogen dryer system manufacturer
- Oil type mold temperature controller
- Oil type mold temperature controllers
- open day
- optical component injection molding
- Optical-grade dehumidifying dryer
- Outbound links: No outbound links appear in this page. Add some! Images: No images appear on this page. Add some! Internal links: No internal links appear in this page
- packaging injection molding
- Packaging Solutions
- PET Preform injection molding
- phone case maker machine
- phone case making machine
- phone cover making machine
- PID Control Mold Temperature Controller
- plastic auto loader
- plastic bottle making machine
- plastic bottle manufacturing
- plastic bucket making machine
- plastic bucket manufacturing
- Plastic chair making machine
- plastic dryer for injection molding
- plastic forming equipment
- Plastic Granulator
- Plastic Granulators
- plastic hopper dryer
- plastic injection machine
- plastic injection machines
- plastic injection molding
- Plastic injection molding equipment
- Plastic injection molding machine
- Plastic Injection Molding Machines
- plastic injection moulding machine
- plastic injection moulding machines
- plastic injection robot
- plastic molding
- Plastic Molding Industry
- Plastic Molding machine
- plastic molding machine 1
- Plastic Molding Machines
- plastic molding press
- plastic moulding machine
- plastic phone case making machine
- plastic-molding machine
- powerful granulator
- Powerful Type Sound-Proof Granulator
- precision injection molding
- precision injection molding machines
- production of plastic seats
- pure water mould temperature controller
- Robot injection molding
- robot injection molding machine
- robot manufacturing companies
- Robotic arm for injection molding machine
- robotic injection molding machines
- robotics in injection molding
- SCARA robot
- SCARA robots
- Screw dosers
- Service-oriented manufacturing
- Servo Cylinder Robot
- servo driven robot
- Servo Driven Robots
- servo injection molding machine
- servo injection robots
- servo motor-driven linear robots
- servo-driven 3-axis robot
- Servo-driven injection molding machine
- Servo-Driven Robot
- Setup of injection machine
- Silicone Injection Molding Machine
- six-axis industrial robot
- Smart Manufacturing
- soundproof granulator
- Sprue Picker
- Stainless Hopper Dryer
- Stainless Hopper Dryers
- star club
- swing arm robot
- T1 Cartesian injection robot
- take-out robot
- take-out robots
- Thailand 4.0
- the choice between servo-driven robots and hydraulic robots will have a certain impact on efficiency
- the most popular injection molding machine
- the type of injection molding robot
- TIC2000 Control System
- TMII injection molding machine
- toggle clamp injection molding machine
- Toggle Hydraulic Injection Molding Machines
- toggle injection molding machine
- Top 10 brands of injection robots
- Topstar
- Topstar Electric Injection Molding Machine InterPlas Thailand 2025 Smart Manufacturing Thailand 4.0
- Topstar Engineering
- Topstar Industrial Robots
- Topstar injection molding intelligent
- Topstar Scara Robots
- Useful Injection molding machine
- Vertical machining centers
- volumetric type blender
- Washing Machine Case Molding Solution
- water chiller
- water chillers
- water distributor
- water type mold temperature controller
- Water Type MoldTemperature Controller
- Water-Cooled Chillers
- Water-cooled Mold Temperature Controller
- water-type mold temperature controller
- Water-Type Mould Temperature Controllers
- We often face choices when performing injection molding. We will choose the type of injection molding machine
- wholesale of injection molding machines
- x carve CNC
- 热门查询 点击次数 展示 排名 topstar